Quick start guide

User Guide

Setup, usage, and troubleshooting for your Wave Clock.

Getting started

Set it up in a few steps

Step 1

Plug it in

Remove the protective plastic film from WaveClock before doing anything else. Then connect the black 90 degree USB-C connector to the bottom of WaveClock and have it pointing towards the back. Then plug the white USB-C cord into it and any charging block. Finally put the WaveClock on the wooden stand and slide it to the left. Beautiful.

Step 2

Join your WiFi (first time only)

On your phone, join the network called "WaveClock-Setup", the same way you'd join any other WiFi network. A setup page will pop up automatically — just pick your home WiFi, enter the password, and your Wave Clock takes it from there. This page is WiFi setup only; you'll finish the rest in the next step.

Step 3

Finish setup on the clock

Once it's connected, press the Bottom button to open Settings, turn the wheel to Online, then press the wheel in — a QR code shows up on the screen. Scan it with your phone to pull up your Wave Clock's own setup page, and just follow along from there: set your location, choose your settings (Screen Cycle, which Screens you want on, and your Sunset Reminder preference), and design your 3 Custom screens. Everything you choose syncs right back to the clock, which drops into the Tide screen once you're done.

On Android and the setup page didn't pop up in Step 2? That's a known quirk with some phones, not your clock — see the quick fix →

That's it — your Wave Clock is ready to go.

Design your own

Fun way to show what you want

No app needed.

Setup Custom Screens — press the Bottom button to open Settings, turn the wheel to Online, then press the wheel in — a QR code shows up on the screen. Scan it with your phone to pull up your Wave Clock's own setup page, bookmark this page. Now you can pick your 3 Custom screens.
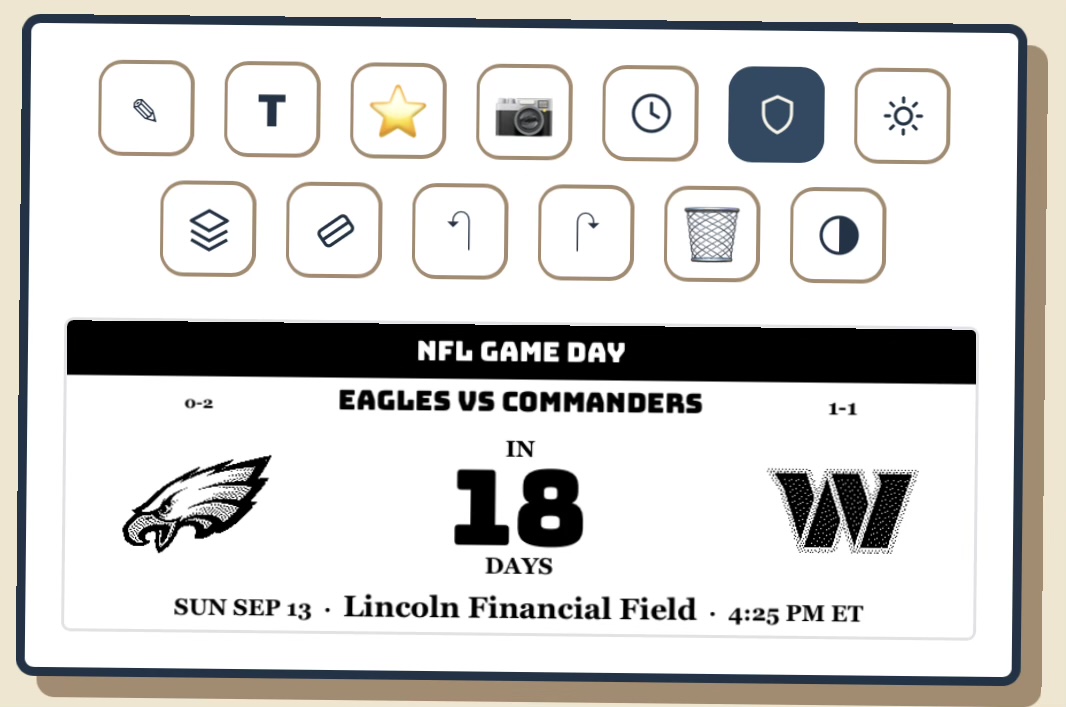
Wave Clock custom screen showing the Team Schedule tool set to the Eagles, with a Game Day card counting down 18 days to Eagles vs Commanders, both teams' records and logos, and the game's date, venue, and time.

Beyond drawing and photos, a few tools keep themselves current once you set them up — no app, no re-publishing:

The controls

What each button does

Top button
Next screen
Wheel – up/down
Browse screens either direction
Wheel – press
Turn screens on/off (while in Settings), or show/hide the QR code (while viewing your Custom screen)
Bottom button
Open Settings — press again to flip through pages, once more to close
Hold top button (5 sec)
Open Diagnostics — see Troubleshooting

The seven screens

What it cycles through

It cycles through these on its own, or flip through them anytime.

About Sunset: by default, it takes over about 30 minutes before sunset so you don't miss it. Adjust the timing — or turn it off entirely — in Settings. Once the sun's actually down, the screen flips to a dark, nighttime look — a real moon (correctly shaped for whichever phase it's in that night) and a scattering of stars, with the upcoming sunrise time shown instead of the next sunset.

Settings

Press the bottom button to open

Press it again to flip through the pages, and once more to close.

Troubleshooting

If something's off

A small warning triangle shows up

Just a WiFi hiccup — hold the top button for 5 seconds to check its connection.

Checking for a software update

It checks on its own every night. To check right now: hold the top button 5 seconds, then press the wheel.

Holding the top button for 5 seconds also shows technical details (firmware version, WiFi signal, device ID) — handy to have on hand if you ever need to reach out for support.

Switching to a different WiFi network

Unplug it, hold the bottom button, and plug it back in while still holding it. This only forgets your WiFi — everything else stays put. Then set up WiFi again like the first time.

The screen seems frozen or stuck

  • Hold the top button 5 seconds to check its WiFi connection.
  • Unplug and plug it back in — nothing gets erased.
  • Still stuck? Reach out to us.